Beyond mere compliance, a comprehensive fire alarm inspection is a critical process that safeguards lives and property. It's the difference between a minor incident and a catastrophe. A detailed fire alarm inspection checklist ensures no component is overlooked, from the central control panel to the furthest notification device. With advancing technology and stricter codes like NFPA 72, having a systematic approach is essential for facility managers, building owners, and fire safety technicians.
This guide provides an in-depth, 7-point checklist that breaks down each critical system area. We'll move beyond generic advice to offer actionable steps, testing frequencies, and regulatory standards for each component. Ensuring the underlying electrical systems are sound is also a foundational aspect of fire safety. Adhering to comprehensive safety protocols, such as the Dutch NEN 1010 electrical safety standards, is paramount for all electrical installations within a building, including fire alarm systems.
We will cover the specifics of inspecting control panels, testing smoke and heat detectors, verifying manual pull stations, and ensuring notification appliances work as intended. You will learn how to properly test emergency power supplies and duct detectors, making your inspection thorough, efficient, and effective. Let's begin building a safer environment, one checkpoint at a time.
1. Control Panel Inspection and Testing
The fire alarm control panel (FACP) is the brain of your entire fire protection system. It acts as the central command center, monitoring all detection devices like smoke and heat detectors, processing their signals, and activating notification appliances such as horns, strobes, and speakers. A thorough inspection of the FACP is the foundational first step in any comprehensive fire alarm inspection checklist, as its failure can render the entire system useless.
Why FACP Inspection is Critical
Proper FACP functionality ensures that in an emergency, signals are correctly received and alarms are triggered without delay. This inspection verifies that the panel's primary and backup power supplies are working, all connected circuits are supervised and operational, and the system can accurately report its status. For instance, a Notifier NFS2-3030 panel in a high-rise building must flawlessly manage hundreds of devices across numerous floors; a missed trouble signal or faulty battery could have catastrophic consequences. Similarly, a Simplex 4010ES in an industrial setting must be robust enough to handle complex logic and control fire suppression systems.
Key Inspection Tasks and Best Practices
A technician's inspection goes beyond a simple visual check. It involves a systematic series of tests to confirm every aspect of the panel's operation.
- Visual and Functional Checks: Verify that all LED indicator lights (power, alarm, trouble, supervisory) function correctly during a lamp test. Ensure the panel's display is clear and free of damage or errors.
- Power Supply Verification: Test both the primary AC power and the secondary power source (backup batteries). This includes performing a load test on the batteries annually to ensure they can sustain the system for the required duration during a power outage, as mandated by NFPA 72.
- Circuit and Zone Integrity: Check all initiating and notification circuit connections for tightness and signs of corrosion. The inspection should confirm the panel accurately reports the status of each zone.
- Documentation and Firmware: Document every test, trouble signal, and corrective action taken in the system logbook. It is also crucial to check for and apply any manufacturer-recommended firmware or software updates to maintain system security and functionality.
This infographic summarizes the core components of a control panel inspection, focusing on frequency, power, and status monitoring.

The key takeaways highlight that consistent testing, vigilant power supply management, and clear system status reporting form the three pillars of a reliable FACP. These elements work together to ensure your system is always ready to respond.
For a visual walkthrough of a typical fire alarm panel and its components, see the video below.
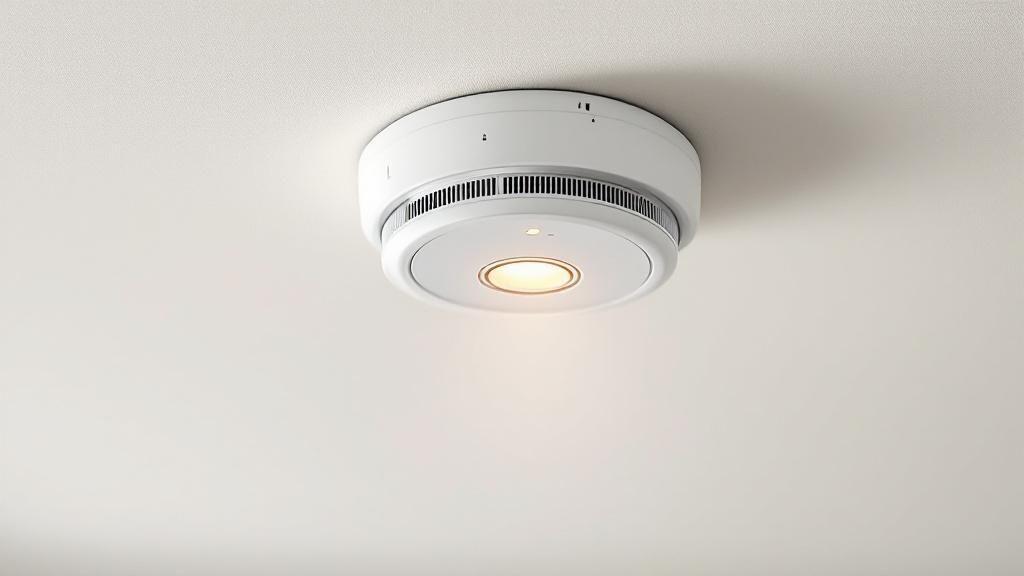
2. Smoke Detector Functionality and Sensitivity Testing
Smoke detectors are the frontline sensors in a fire alarm system, designed to provide the earliest possible warning by detecting smoke particles in the air. This part of the fire alarm inspection checklist focuses on verifying that these critical devices not only work but also function at the correct sensitivity level. A detector that is too sensitive can cause nuisance alarms, while one that is not sensitive enough may fail to activate in a real fire.
Why Detector Testing is Critical
Proper detector functionality ensures that an alarm is triggered promptly when smoke is present. The inspection confirms that each detector responds to simulated smoke, is free from environmental contamination like dust or insects, and maintains optimal placement for effective coverage. For instance, testing Hochiki ALF-EN photoelectric detectors in a hotel ensures they can detect smoldering fires common in residential settings. Similarly, verifying Apollo Discovery series detectors in a manufacturing facility confirms they can operate reliably amidst dust and variable conditions, preventing false alarms that could halt production.
Key Inspection Tasks and Best Practices
A technician's process for testing smoke detectors is multifaceted, combining physical tests, sensitivity measurement, and visual inspection to guarantee reliability.
- Functional and Sensitivity Testing: Use a calibrated smoke test aerosol or an electronic tester to introduce a controlled amount of simulated smoke into the detector's chamber. This verifies the detector sends an alarm signal to the control panel. Per NFPA 72, a calibrated sensitivity test must be performed within one year of installation and every two years thereafter to ensure it is within the manufacturer's listed range.
- Visual Inspection and Cleaning: Visually inspect each detector for physical damage, heavy dust accumulation, or paint covering the vents. The technician must check for proper spacing according to code and ensure detectors are not placed too close to HVAC vents or in areas prone to steam. Detector chambers should be cleaned annually to prevent contamination that can affect performance.
- Date and Replacement Check: All smoke detectors have a limited lifespan, typically around 10 years. The inspection includes checking the manufacturing date on each unit and creating a plan to replace any that are approaching or have exceeded their recommended service life, as specified by manufacturers like System Sensor Corporation.
3. Heat Detector Response and Temperature Rating Verification
Heat detectors are designed to respond to elevated temperatures, making them essential components of a fire alarm inspection checklist. They serve as a critical fire detection method in environments where smoke detectors are prone to false alarms, such as dusty industrial spaces, commercial kitchens, or unheated warehouses. These devices trigger an alarm either when the ambient temperature reaches a specific, predetermined point (fixed-temperature) or when it increases at an abnormally high rate (rate-of-rise).
Why Heat Detector Inspection is Critical
Properly functioning heat detectors ensure timely alerts in conditions where smoke might not be the first sign of a fire. An inspection verifies that the detector's thermal sensing element is unobstructed, responsive, and calibrated to the correct temperature rating for its specific environment. For example, a Fenwal fixed-temperature detector in a commercial kitchen must be able to distinguish between normal high cooking heat and a genuine fire. Similarly, a System Sensor rate-of-rise detector in a large warehouse must be sensitive enough to detect a fast-developing fire without being triggered by normal daily temperature fluctuations.
Key Inspection Tasks and Best Practices
A technician's evaluation of heat detectors must be precise and methodical, often requiring specialized tools to simulate fire conditions safely and accurately.
- Functional Testing: Use a manufacturer-approved heat gun or listed testing tool to apply controlled heat to the detector. This verifies that both fixed-temperature and rate-of-rise mechanisms (if applicable) trigger an alarm at the control panel within the specified time.
- Temperature Rating Verification: Confirm that the detector's temperature rating is appropriate for its location. A detector rated for 135°F is standard for many living spaces, but a 194°F or higher model is necessary for areas near heat sources like boiler rooms or attics.
- Physical and Mounting Checks: Visually inspect the detector for physical damage, corrosion, or paint that could insulate the thermal element and impede heat transfer. Ensure it is mounted securely and maintains proper clearance from walls and obstructions as outlined in NFPA 72.
- Restorability Confirmation: For restorable heat detectors, ensure they reset correctly after activation and testing. Non-restorable (single-use) models must be replaced after they have been activated.
4. Manual Pull Station Operation and Accessibility
Manual pull stations are the most direct way for building occupants to initiate a fire alarm. These devices allow anyone who discovers a fire to manually trigger the system, bypassing the need for an automatic detector like a smoke or heat sensor to activate first. A key part of any fire alarm inspection checklist is verifying these stations are not only functional but also clearly visible, unobstructed, and accessible to everyone, including individuals with disabilities.
Why Pull Station Inspection is Critical
The immediate manual activation of an alarm can save precious minutes in an emergency, accelerating evacuation and fire department response. This inspection confirms that the pull stations will work as intended when needed. For instance, a Notifier NBG-12LX pull station in a school hallway must be easy for a student or teacher to find and operate. Similarly, a Simplex 4099-9003 station in a hospital must function reliably without requiring excessive force, ensuring that staff or even patients can activate it. The inspection ensures these life-saving devices are not ignored, painted over, or blocked by furniture or equipment.
Key Inspection Tasks and Best Practices
A technician's evaluation of manual pull stations is a hands-on process that checks both physical compliance and electrical functionality.
- Accessibility and Visibility: Verify that each pull station is mounted at the correct height, typically between 42 and 48 inches from the floor to the activating handle, to comply with ADA standards. Ensure there is a clear, unobstructed path to the station and that it is conspicuous, with clear signage.
- Operational Testing: Test the pull mechanism to confirm it activates with less than 5 pounds of force. This involves a full test where the station is pulled, an alarm signal is sent to the control panel, and the device is then reset using the appropriate key.
- Device Integrity and Labeling: Inspect the physical condition of the station for any damage, corrosion, or paint that could hinder its operation. Confirm that all instructional labels are legible and correct. For outdoor or harsh environments, like with a Honeywell FRGWPS weatherproof station, check that the protective cover and seals are intact.
- System Communication: After activating a station, the technician must confirm the fire alarm control panel correctly receives the signal and identifies the specific device location. This confirms the wiring and communication link are sound.
5. Notification Appliance Testing (Horns, Strobes, Speakers)
Notification appliances are the essential output devices of a fire alarm system, designed to alert building occupants of an emergency through audible and visual signals. This part of the fire alarm inspection checklist focuses on verifying that horns, strobes, and speakers function correctly, ensuring that every person, including those with hearing or visual impairments, receives a clear and unmistakable warning. Their proper operation is a non-negotiable requirement for life safety.
Why Notification Appliance Testing is Critical
Effective notification is the critical link between fire detection and safe evacuation. If a horn is too quiet, a strobe is obscured, or a speaker is unintelligible, the system fails to perform its primary function. This inspection confirms that devices meet audibility, visibility, and intelligibility standards mandated by the Americans with Disabilities Act (ADA) and NFPA 72. For example, a System Sensor SpectrAlert Advance strobe in a bustling office lobby must flash brightly enough to cut through ambient lighting, while the horn in a Wheelock E70 unit in a loud industrial plant must be piercing enough to be heard over machinery.
Key Inspection Tasks and Best Practices
A technician performs both qualitative and quantitative tests to ensure these devices are not just working, but are effective in their installed environment. This process validates performance under both primary and backup power.
- Audibility and Sound Level Verification: Use a calibrated sound level meter to measure decibel levels in various areas. Per NFPA 72, audible signals must be at least 15 dB above the average ambient sound level or 5 dB above the maximum sound level lasting at least 60 seconds, whichever is greater.
- Visual Appliance Functionality: Confirm all strobes flash and are synchronized across the same notification zone to prevent triggering photosensitive epilepsy. Strobes must be unobstructed and meet the candela rating specified for the room size and ceiling height.
- Intelligibility for Voice Systems: For emergency voice communication systems, like those using Gentex Commander speakers in a dormitory, perform an intelligibility test to ensure messages are clear and understandable, not just loud.
- Coverage and Power: Verify that appliances are installed according to the original design plans for proper spacing and coverage. The inspection must include testing the devices while the system operates on its secondary (battery) power to ensure functionality during a power outage.
6. Emergency Power Supply and Battery Backup Testing
An emergency power system is the lifeline of a fire alarm during a utility power failure, ensuring uninterrupted protection when it's most needed. It typically consists of a secondary power source, most commonly sealed lead-acid batteries, that automatically takes over if primary AC power is lost. This part of the fire alarm inspection checklist is non-negotiable, as it confirms the system can operate for the code-required duration, typically 24 hours in standby followed by 5 minutes in full alarm.
Why Emergency Power Testing is Critical
A fire alarm system without reliable backup power is a significant liability. In the event of a power outage, which can be caused by the fire itself or an external event, the system must remain fully operational to detect threats and alert occupants. This inspection validates the health of the batteries, the functionality of the charging circuits, and the automatic transfer process. For instance, Power Sonic sealed lead-acid batteries in a standard commercial building must hold enough charge to power the system, while specialized Saft lithium batteries might be used in industrial settings with extreme temperatures, demanding specific testing protocols. In a hospital, where evacuation is complex, Enersys Genesis batteries must provide absolute reliability.
Key Inspection Tasks and Best Practices
Verifying the emergency power supply involves more than just checking a voltage reading. A technician must perform rigorous tests to simulate a real-world power failure and confirm system endurance.
- Battery and Charger Verification: Inspect batteries for any signs of corrosion, swelling, or leakage. Terminals must be clean and connections properly torqued. The technician will verify that the battery charger is supplying the correct float voltage as specified by the manufacturer.
- Annual Load Testing: NFPA 72 mandates an annual load test. This involves disconnecting the primary AC power and forcing the system to run on batteries while under its maximum alarm load (all notification devices activated). This test confirms the batteries can sustain the system for the required duration.
- Documentation and Replacement: Meticulously document all battery installation and replacement dates directly on the batteries and in the system logbook. Batteries have a finite service life, typically 3-5 years, and must be proactively replaced to prevent unexpected failure during an emergency.
- Transfer Function Test: The inspection confirms that the fire alarm control panel seamlessly and automatically switches to the battery backup upon loss of AC power and correctly generates a "trouble" signal indicating the power loss.
7. Duct Smoke Detector Inspection and Air Flow Testing
Duct smoke detectors are a specialized component of your fire protection strategy, installed directly within HVAC ductwork. Their primary function is to detect smoke circulating through the air handling system and trigger a shutdown of fans and dampers. This crucial action prevents the system from spreading toxic smoke throughout the entire building, a process known as "smoke control," which is a vital part of a complete fire alarm inspection checklist.
Why Duct Detector Inspection is Critical
Unlike standard room detectors, duct detectors don't initiate a building-wide evacuation alarm. Instead, they protect the building's occupants by containing the smoke to its area of origin. Proper inspection ensures the detector is correctly sampling the air, is sensitive enough to detect smoke, and can effectively command the HVAC system to shut down. For example, a System Sensor DH100 series detector in a commercial office building must respond to minimal smoke levels to prevent panic and smoke inhalation on other floors. Similarly, a Notifier FST-851 in an industrial ventilation system must reliably shut down massive fans to maintain safe air quality in an emergency.
Key Inspection Tasks and Best Practices
A technician's inspection involves both the detector itself and its interaction with the mechanical systems it controls, often requiring coordination with HVAC professionals.
- Air Sampling and Integrity: Verify that the air sampling tubes are correctly installed, facing the proper direction of airflow, and are not obstructed by dust or debris. The integrity of the detector's housing gasket is also checked to ensure no air leaks can compromise the sample.
- Air Flow Verification: Using a magnehelic gauge or anemometer, the technician must confirm that the air velocity across the detector meets the manufacturer's specifications, typically between 300 and 4,000 feet per minute (FPM). Insufficient airflow can prevent smoke from ever reaching the sensor.
- Functional Testing and Shutdown: The detector is functionally tested using approved aerosol smoke or the device's test button. The critical part of this test is confirming that the detector sends the correct supervisory signal to the fire alarm control panel and, most importantly, successfully triggers the shutdown of the associated air handler unit (AHU).
- Cleaning and Documentation: As part of annual maintenance mandated by NFPA 72, the detector and sampling tubes must be cleaned to prevent false alarms or failures. All tests, readings, and shutdown confirmations are meticulously documented in the inspection report.
7-Point Fire Alarm Inspection Comparison
From Checklist to Action: Streamlining Your Inspection Workflow
Navigating the intricacies of a comprehensive fire alarm inspection checklist is a mission-critical task that safeguards lives and property. We have explored the essential components, from the central control panel and its intricate wiring to the individual smoke detectors, heat sensors, and manual pull stations scattered throughout a facility. This guide has detailed the specific tests and verifications required to ensure every element, including notification appliances and vital emergency power supplies, functions exactly as designed.
The core takeaway is that a successful inspection is not just about ticking boxes. It's about a systematic, detail-oriented process that leaves no stone unturned. A single overlooked detail, like an improperly calibrated heat detector or a partially obstructed strobe light, can have devastating consequences. Therefore, treating this checklist as more than a procedural formality is the first step toward creating a truly resilient fire safety system.
Bridging the Gap Between Fieldwork and Follow-Up
Executing a flawless inspection is only half the battle. The true challenge for many technicians and administrative teams lies in what happens next: translating field data into actionable work orders, compliant reports, and timely invoices. This is where meticulous execution can be undermined by inefficient post-inspection workflows.
Consider the common pain points:
- Illegible Handwriting: Deciphering hastily written notes from the field can lead to errors, requiring time-consuming follow-up calls to technicians.
- Delayed Reporting: Manually transferring data from a paper checklist into a digital system creates a significant administrative bottleneck, delaying critical repair recommendations and client communication.
- Lost Information: Photos of failed devices, specific model numbers, or quick voice notes detailing a complex issue can easily get lost in text threads or personal camera rolls, creating information gaps.
Mastering your inspection workflow means closing this gap between field and office. The goal is to create a seamless flow of information, ensuring that every crucial detail captured during the inspection is immediately available, organized, and ready for action.
The Power of an Optimized Workflow
By adopting a modern approach to documentation and communication, you transform your fire alarm inspection checklist from a static document into a dynamic tool. When a technician can instantly log a failed battery test on the emergency power supply or document a faulty speaker via a simple voice message, the entire operational chain benefits. The office team can immediately quote repairs, order necessary parts, and schedule follow-up work without delay. This not only enhances safety by speeding up remediation but also improves cash flow by accelerating the billing cycle. Ultimately, streamlining this process ensures that your expertise in the field translates directly into operational excellence and unparalleled client trust.
Ready to eliminate paperwork and streamline your reporting? Discover how Nora, your AI-powered operations assistant, can instantly turn your technicians' field notes, photos, and voice memos from any fire alarm inspection into structured, actionable reports. Visit Nora to see how you can bridge the gap between the checklist and the invoice.